
How to Clean Your Furnace for Winter: Best Practices

Professional Services Heating, AC & Electric Repair

January 25, 2022

If you are wondering how to clean your furnace for winter, you might be glad to know that Professional Services hears this question frequently. As West Bend's trusted HVAC company, we like to emphasize that a furnace is a vital investment that requires consistent maintenance, but there are quite a few ways to prepare it for Wisconsin’s harsh winters.


Below, Professional Services provides a simple method for keeping the furnace clean so that you can avoid breakdowns, extend the unit’s longevity, and heat any size home more efficiently.


A Note on Why Cleaning The Furnace is Important

Before our team delves into the step-by-step process for safely cleaning a gas furnace, it is helpful to look at how proper maintenance benefits a furnace. For example, cleaning a furnace at least once a year is typically enough, but this changes with the furnace’s age, repair history, energy efficiency, and overall condition. Getting stuck without a working furnace in the middle of a Wisconsin cold spell is not an option, and a basic cleaning session could prevent a major headache in the dead of winter. 


Cleaning the furnace:


  • extends its life
  • prevents costly breakdowns and emergency repairs
  • removes dust and debris from moving parts and ail filters
  • stops clogging inside the furnace
  • improves efficiency and heat distribution
  • saves money on monthly energy bills


The right cleaning tools and techniques are crucial for safe maintenance, and skipping professional cleaning sessions is never a good idea. Without maintenance, a furnace is likely to overheat, shut off completely, or produce harmful carbon monoxide. Rather, entrust the unit to teams like Professional Services for consistent results.


Six Best Practices for Gas Furnace Cleaning from Professional Services


1. Turn Off the Power First

A furnace is a high-voltage unit that may use gas or oil for fuel. The combination creates plenty of room for accidents, so the first step in learning how to clean your furnace for winter is turning off the unit’s main power source. You will also need to switch off the fuel source to prevent an explosion.


  • Locate the breaker panel.
  • Turn off the power supply to the furnace and the on-off switch.
  • Turn off the gas shut-off on the inline gas pipe (the shut-off valve for oil will be near the tank).


2. Clean the Combustion Chamber

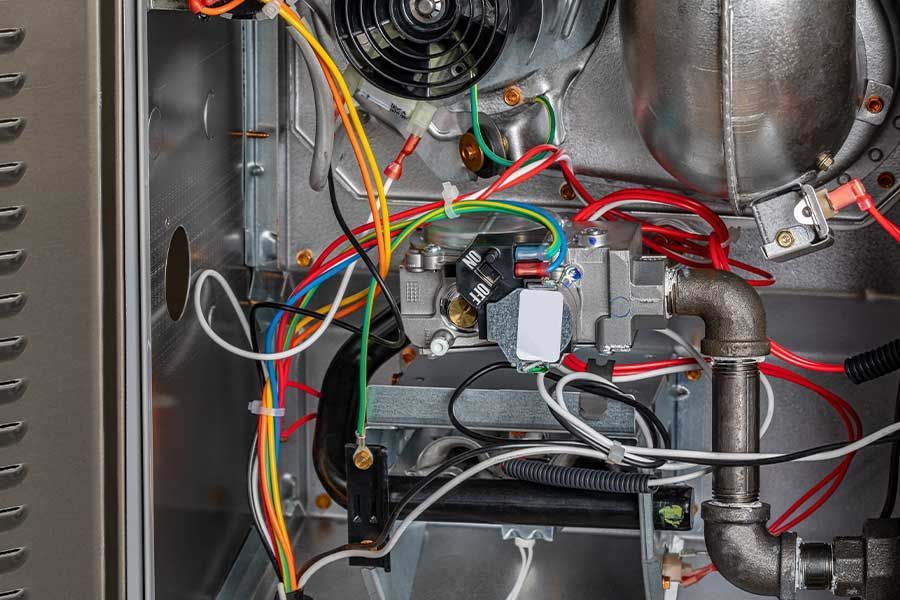
The combustion chamber is where the furnace’s fuel combusts to create heat. This area will typically have soot from gas combustion; extreme cases include corrosion. Dirt is also typical of air ducts and filters that are due for a clean.


  • After turning off the power and fuel line, remove the combustion chamber panel.
  • Turn the power back on to test. If the flame burns yellow, the fuel isn’t burning evenly.
  • Turn the power off.
  • Sweep the soot and loose debris out of the chamber.
  • Use a vacuum for dust from dirty burners and pilot lights, or use a cloth.


Don’t forget to replace the access door.


3. Clean Out the Blower

The blower moves the heated air from the furnace through the ducts and vents. Moving parts include the blower motor, belts, and fan. 


  • Remove the door to the blower and check for holes from corrosion.
  • Next, remove the control board and wires to access the fan. Take a picture of original configurations for easy restoration later.
  • Then, clean the fan using a toothbrush or other small, soft-bristle brush.


The final check is to locate the blower motor housing and use a bigger brush to remove dust from these parts. Vacuum all other particles from the blower compartment and replace the components using the photograph.


4. Check the Furnace Filters

Learning how to clean your furnace for winter includes handling the furnace filters, which capture dirt, pet hair, dust, and other contaminants. A high-end furnace filter will last longer and trap more particles; some are even washable. It is best to replace or clean the filter every few months during the cold season. 


  • Pull out the furnace air filter. If it’s severely clogged, there will not be light poking through it. A completely clogged filter needs replacement, while a washable filter needs washing and drying.
  • Vacuum or wipe debris from the air filter. If your filter is washable, rinse out the leftover debris and only install it once it is completely dry.


Oil furnaces feature an oil filter that also needs regular maintenance—a yearly replacement from Professional Services is sufficient.


5. Check the Oil Motor and Blower Bearings

Older furnaces have motor and blower bearings that facilitate fan movement. These parts need annual oiling to keep the moving parts in good condition. A squeaking sound coming from the furnace is a helpful indication that it needs maintenance. 


  • Locate the motor and blower bearings in the blower compartment.
  • Wipe off the residue on the caps.
  • Take off the caps and lubricate the bearings with a few drops of machine oil
  • Remember to replace the clean caps and tighten them.


6. Test the Furnace

Cleaning the furnace’s exterior is the final step of the process.


  • Wipe it with a damp cloth to remove dust and stubborn particles.
  • Then, restore the electrical power and gas or oil.


It is also important to test the furnace to ensure the correct installation of the filter and thermostat activation. The burners in the combustion chamber should light properly, and there should be no cold air blowing out of the vents around the home. The cleaning session is complete if:


  • the blower does not squeak,
  • the air warms, and
  • burners light properly.


Otherwise, you may need a team like Professional Services to diagnose a deeper problem.


Affordable Winter Furnace Cleaning by Professional Services


Are you interested in learning more about cleaning a furnace or preventing your HVAC unit from freezing? The professional HVAC repair technicians at Professional Services make yearly furnace maintenance and cleaning easy and affordable. Our technicians have over 30 years of in-field expertise, and we cover all of Port Washington, WI, and the surrounding communities. 


Professional Services’ best practices for furnace cleaning are not exhaustive, but it is a great start for exploring how to clean your furnace for winter—call us at (262) 218-2636 today to learn more.

You might also like
June 30, 2026
Electrical rewiring is one of the most significant home improvement projects a homeowner can undertake. For residents of Thiensville, WI, it is often a necessary step to protect both the property's safety and its long-term value. Older homes in the area often have outdated wiring that no longer meets current safety standards, and even newer construction can require rewiring after major renovations. At Professional Services Heating, AC & Electric Repair, our licensed electricians help Thiensville homeowners navigate the rewiring process from initial assessment through final inspection, ensuring every project is completed with the care and precision that electrical work demands. Assessing the Need for Electrical Rewiring in Thiensville, WI Knowing when your home needs rewiring isn't always obvious, but there are clear warning signs that indicate the electrical system is no longer adequate or safe. The age of the home, the condition of the wiring, and any recent structural renovations are the primary factors determining whether a rewiring project is warranted. Homes built before the 1970s in Thiensville and surrounding communities like Mequon and Grafton often feature outdated wiring materials that were standard at the time but are now known to pose elevated safety risks. Frequent circuit breaker trips, flickering lights, and outlets that have stopped functioning reliably are all indicators that the electrical system is struggling to meet current demands. Even relatively new homes may require rewiring if significant additions or renovations have placed new loads on a system that was not designed to handle them. Consulting a licensed electrician is always the right first step, and scheduling a professional electrical inspection gives homeowners a clear, accurate picture of what their system needs before making any decisions. Key Factors to Consider When Rewiring Your Home Before a rewiring project begins, several important factors need to be carefully evaluated to ensure the work is planned and executed to deliver lasting results. The condition of the existing wiring is the starting point, including whether there are signs of physical damage, outdated insulation materials, or circuits that simply lack the capacity to support modern electrical loads. From there, the scope of work needs to be defined clearly. Some homes require targeted upgrades in specific areas, while others need a full rewiring from the panel outward. Proper planning at this stage minimizes disruption to the household and ensures the project stays on schedule. Budget is another practical consideration, as rewiring represents a meaningful investment. That said, the return on that investment comes in the form of improved safety, reduced fire risk, and an electrical system that can support the demands of contemporary home technology. Working with a knowledgeable, licensed contractor who can provide a detailed cost estimate and project timeline from the outset helps homeowners move forward with confidence. Our electrical rewiring team at Professional Services Heating, AC & Electric Repair brings exactly that level of expertise and transparency to every project we take on in Thiensville. Step-by-Step Guide to the Electrical Rewiring Process Understanding what the rewiring process actually involves helps homeowners prepare appropriately and set realistic expectations for the project timeline. At Professional Services Heating, AC & Electric Repair, the process follows a structured approach designed to deliver a safe, code-compliant result with minimal disruption to daily life. The project begins with a thorough assessment of the existing wiring system to identify safety hazards, outdated components, and areas requiring increased capacity. From there, our team works with the homeowner to develop a rewiring plan that aligns with their specific needs and budget. Our certified electricians then methodically remove the old wiring and install updated systems throughout the home, including adding outlets where needed, upgrading the service panel, and installing modern safety features. Every aspect of the installation is carried out in compliance with local electrical codes to ensure the system is both safe and fully permitted. The project concludes with a thorough inspection and testing phase that confirms the new system is functioning correctly before the work is considered complete. For homes where the panel itself requires attention as part of the broader project, our electrical panel repair and replacement services address that component seamlessly as part of an overall upgrade. Selecting the Right Electrical Rewiring Contractor in Thiensville Choosing the right contractor for an electrical rewiring project is a decision that directly affects your home's safety and the durability of the work. The electrician you hire should be fully licensed and insured, with a documented track record of completed rewiring projects and a clear commitment to quality workmanship. When evaluating contractors, ask for a detailed project timeline and a written cost estimate that accounts for all aspects of the work. Confirm that the contractor uses quality materials and follows current industry best practices at every stage. Safety protocols, scheduling flexibility, and responsiveness to questions and concerns throughout the project are all meaningful indicators of a contractor's professionalism. A reputable electrical rewiring contractor will also stand behind their work with a warranty and remain accessible after the project is complete. In our service calls throughout Thiensville, the team at Professional Services Heating, AC & Electric Repair consistently delivers the level of transparency, skill, and accountability that homeowners should expect from any licensed electrical contractor they invite into their home. Our broader electrical services also ensure that the same trusted team can address any additional needs identified during the rewiring process. Preparing Your Home for a Smooth Electrical Rewiring Project With the right contractor selected, preparing the home properly helps the project run efficiently and reduces the likelihood of delays or complications during the work. Clearing paths to electrical panels, outlets, and other work areas gives the crew the access they need to move through the project without unnecessary obstacles. Covering furniture and flooring in work areas helps protect against dust and debris, and unplugging all electronics and appliances before work begins helps keep equipment safe during the process. Turning off the main circuit breaker when directed by the contractor establishes a safe working environment for everyone involved. Maintaining open communication with your contractor throughout is equally important. Understanding the project timeline, knowing when access to specific areas of the home will be needed, and staying informed about progress at each stage all contribute to a smoother overall experience. Taking these steps protects your household during the project and ensures the rewiring work reaches completion on schedule.
June 30, 2026
Carbon monoxide is one of the most serious household safety hazards precisely because it is completely invisible and has no detectable odor. For homeowners in Port Washington, WI, where cold winters mean homes are tightly sealed for months at a time and heating systems run continuously, the risk of carbon monoxide buildup is a genuine concern that deserves thoughtful attention. At Professional Services Heating, AC & Electric Repair, we help Port Washington families protect themselves through proper detector placement, quality equipment selection, and professional installation. Understanding where to place detectors, which features matter most, and how to respond when an alarm sounds are all essential parts of keeping your household safe. Understanding the Importance of Carbon Monoxide Detectors in Port Washington Homes Carbon monoxide is a leading cause of accidental poisoning deaths in the United States, and the symptoms of exposure can range from dizziness and nausea in the early stages to unconsciousness and fatality when levels become critically high. Because the gas is undetectable without monitoring equipment, many people are unaware they are being exposed until symptoms become severe. In Port Washington, the combination of harsh winters and well-insulated homes creates conditions where carbon monoxide can accumulate more quickly than in homes with greater air exchange. Fuel-burning appliances, including furnaces, boilers, water heaters, and gas ranges, are potential sources of carbon monoxide when they are not operating correctly or when ventilation is inadequate. Installing reliable carbon monoxide detectors throughout your home gives your family the early warning needed to evacuate and seek help before exposure reaches dangerous levels. Professional Services Heating, AC & Electric Repair offers carbon monoxide and smoke detector installation services to ensure your home's detection system is set up correctly from the start. Determining the Optimal Placement for Carbon Monoxide Detectors in Your Home Proper placement is one of the most important factors in ensuring your detectors can do their job effectively. A detector placed in the wrong location may not alert your family in time, even if it is functioning correctly. Based on what we see in Port Washington properties during our installation calls, following a structured placement approach makes a significant difference in overall coverage and response time. The following guidelines reflect best practices for carbon monoxide detector placement throughout your home: Install detectors on every level of your home, including the basement and attic Place detectors within 15 feet of each bedroom door so sleeping family members can hear the alarm Position units at least 5 feet from fuel-burning appliances to avoid false readings Avoid areas with high airflow, such as near windows, doors, or ventilation registers Choose detectors with digital displays so CO levels can be monitored at a glance Keeping your home's electrical system up to date and in compliance with code also affects how reliably your detectors function, particularly for hardwired models. Our team can assess your setup and recommend any updates needed to support a complete and dependable detection system. Selecting the Ideal Carbon Monoxide Detector for Your Household Needs Not all carbon monoxide detectors offer the same level of protection, and choosing the right model for your home is worth the extra consideration. Detectors with digital displays provide clear, real-time readouts of CO levels rather than simply sounding an alarm when a threshold is crossed, giving you more actionable information in a potential emergency. Models equipped with electrochemical sensors are significantly more accurate and durable than those using metal oxide sensors, making them the preferred choice for residential use. Interconnected detectors are another strong option, linking multiple units so that when one alarm triggers, every detector in the home sounds simultaneously. This is particularly valuable in larger homes or multi-story properties along the bluffs above Lake Michigan, where a detector on one floor might not be heard on another. Battery backup capability is essential for maintaining protection during power outages, and selecting a unit with a lifespan of five years or more reduces the frequency of full replacements. Pairing proper detector installation with routine electrical inspection ensures that your home's wiring and safety systems are functioning to the standards needed to keep your family protected. Ensuring Proper Carbon Monoxide Detector Installation and Maintenance Choosing the right detector is only effective when it is installed correctly and kept in reliable working condition. During our service calls throughout Port Washington and surrounding areas such as Grafton and Cedarburg, the team at Professional Services Heating, AC & Electric Repair finds that improper installation and deferred maintenance are the most common reasons detectors fail when they are needed most. The following steps help ensure your CO detectors remain dependable over time: Position detectors at least 15 feet from fuel-burning appliances and approximately 5 feet from bedroom doors Install units at the manufacturer-recommended height, typically around 5 feet from the floor Test each detector monthly and replace batteries at least twice per year Clean detectors regularly to prevent dust accumulation that can interfere with sensor accuracy Replace the entire unit every 5 to 7 years, as CO detectors have a defined operational lifespan Keeping your fuel-burning appliances properly maintained is equally important in preventing the conditions that lead to carbon monoxide leaks. Scheduling regular heating system maintenance through Professional Services Heating, AC & Electric Repair ensures that your furnace and other combustion-based equipment are operating safely and efficiently throughout the heating season. Recognizing the Signs of Carbon Monoxide Exposure and Taking Immediate Action Even with detectors properly installed and maintained, every member of the household should understand the physical warning signs of carbon monoxide exposure and know exactly what to do if an alarm sounds. Symptoms, such as persistent headache, dizziness, nausea, and unusual fatigue, can indicate that CO levels inside the home are rising to dangerous levels, particularly if multiple people or pets are experiencing them simultaneously. If your carbon monoxide detector sounds, evacuate the home immediately and contact emergency services from outside. Never attempt to locate the source of the leak yourself or dismiss the alarm as a false trigger. Carbon monoxide is fatal at high concentrations and acts quickly. Once emergency responders have cleared the situation, having a certified technician inspect all fuel-burning appliances in the home is a critical next step to identify and eliminate the source before the home is reoccupied.
June 30, 2026
A leaking water heater is never something to put off, and for homeowners in Thiensville, WI, identifying the cause early can mean the difference between a straightforward repair and significant water damage. At Professional Services Heating, AC & Electric Repair, we respond to water heater concerns throughout the Thiensville area and surrounding communities, and we understand how quickly a minor leak can develop into a more serious problem. Whether the issue stems from a faulty valve, corrosion, or mineral buildup, getting a professional assessment as soon as a leak is noticed is always the right call. Regular maintenance of your water heater also plays a major role in preventing these situations from developing in the first place. Common Causes of Water Heater Leaks in Thiensville, WI Water heaters are built to last, but they are not immune to wear over time, and certain failure points tend to appear more frequently than others. In our service calls throughout Thiensville and nearby communities like Mequon and Grafton, the most common causes of water heater leaks that the team at Professional Services Heating, AC & Electric Repair encounters include a faulty temperature and pressure relief valve, a damaged tank liner, and mineral buildup inside the tank. The temperature and pressure relief valve, commonly referred to as the T&P valve, is designed to release excess pressure and prevent tank failure, but it can degrade and malfunction over time. A cracked tank liner typically develops due to corrosion and causes slow, persistent leaks that worsen if left unaddressed. Mineral deposits that accumulate inside the tank gradually weaken its structural integrity and can eventually cause it to fail. Addressing these issues promptly is critical to preventing water damage and protecting your home. Our water heater repair team at Professional Services Heating, AC & Electric Repair is ready to diagnose and resolve any leak you may be experiencing. Pinpointing the Source of a Water Heater Leak When water is pooling around your water heater, identifying exactly where it is coming from is an essential first step before any repair can be made. A thorough inspection begins by examining the tank's exterior for visible cracks, rust, or other signs of deterioration. If the tank appears structurally sound, the leak is often traced back to one of the connections surrounding it, such as the inlet and outlet pipes, the pressure relief valve, or the temperature-pressure relief valve. These fittings can loosen or corrode over time, creating small but persistent leaks. The drain valve is another common source of water heater leaks and should always be checked as part of the diagnostic process. By methodically working through each component, a professional technician can isolate the exact source and recommend the most appropriate repair or replacement path. Catching a leak at this stage prevents further structural damage and prevents water damage from spreading into flooring, walls, and surrounding areas. Scheduling routine plumbing services helps ensure your water heater and its connections are inspected regularly before problems develop. Recognizing When a Water Heater Leak Needs Professional Attention Some water heater issues present early warning signs that are manageable with prompt professional service, while others indicate a more serious underlying problem that requires immediate expert intervention. When a leak is extensive, the unit is older, or there are signs of sediment buildup, failing internal components, or compromised tank integrity, attempting to address the situation without professional expertise can lead to further damage or create safety risks inside the home. At Professional Services Heating, AC & Electric Repair, our certified technicians are equipped to accurately diagnose the root cause of any water heater leak and recommend the most effective solution, whether that means a targeted repair or a full unit replacement. Working in homes across Thiensville, we consistently find that homeowners who contact us early in the process face significantly lower repair costs and avoid the secondary damage that can result from a leak left too long. For situations that cannot wait, our team is available for urgent service calls to restore your hot water and protect your home as quickly as possible. If your system requires broader attention beyond the water heater itself, our drain cleaning services can address any underlying plumbing conditions contributing to the problem. Preventing Future Water Heater Leaks and Extending Its Lifespan The most cost-effective approach to water heater ownership is a consistent preventative maintenance routine that catches developing issues before they become leaks. Based on what we see in Thiensville properties throughout the year, the following maintenance practices make the greatest difference in extending the lifespan of a water heater and reducing the risk of unexpected failures: Flushing the water heater annually to remove sediment buildup, which weakens the tank and contributes to leaks over time Checking the anode rod regularly and replacing it when necessary to protect the tank interior from corrosion Inspecting the pressure relief valve to confirm it is functioning correctly and preventing excessive pressure from building up inside the tank Insulating the water heater and surrounding pipes to improve efficiency and reduce the risk of freeze-related damage during Thiensville winters Staying consistent with these steps keeps your system operating at the right level of efficiency and significantly reduces the likelihood of a sudden failure. Pairing water heater maintenance with regular attention to your home’s plumbing system, including water line performance and pressure regulation, ensures that every part of your water infrastructure is properly maintained and protected throughout the year.

Book a Service Today