Heat Pump Not Heating Enough? Key Reasons You Should Know

Professional Services
February 28, 2025

If you’ve noticed that your heat pump isn’t warming your space as it should, exploring the underlying causes is essential. You might be dealing with something as simple as incorrect thermostat settings or as complex as a refrigerant leak. Factors like clogged air filters or a frozen unit could also contribute to the issue. Mechanical failures and installation errors might further complicate matters. Understanding these problems can help you address them effectively and comfort your home. But what steps should you take next, and how can you guarantee your heat pump operates efficiently?


Incorrect Thermostat Settings

To guarantee ideal heat pump performance, verify that the thermostat settings are not incorrectly configured, which can directly affect the system’s heating efficiency. Ensure the thermostat is accurately set to ‘heat’ mode rather than ‘cool’ or ‘auto.’ Misconfigurations can cause the heat pump to operate inefficiently or fail to provide adequate warmth. Check that the setpoint temperature is high to prompt the heat pump to initiate heating cycles.


Examine the programmable settings to see if your thermostat has schedule capabilities. Incorrect programming can cause the system to activate or deactivate at improper times, leading to inconsistent heating. Adjust the schedule to align with your household’s heating demands, ensuring peak comfort and energy efficiency.


Assess the thermostat’s location. If exposed to direct sunlight, drafts, or heat sources, it can relay inaccurate readings to the heat pump, inadvertently altering its operation. Relocating the thermostat to a central, stable environment may be necessary.
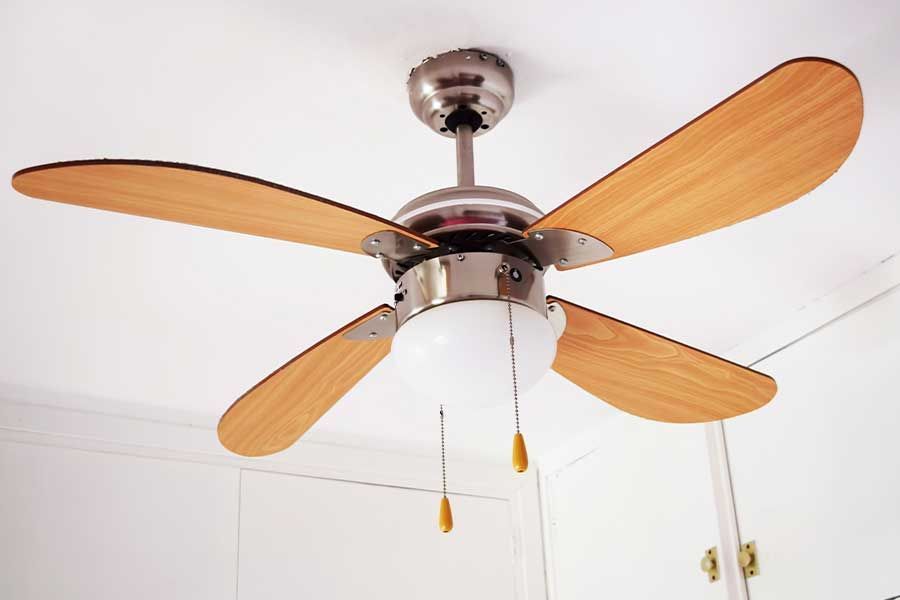

Clogged Air Filters

Clogged air filters impede airflow, diminishing the heat pump’s efficiency and preventing it from adequately heating your space. When filters become saturated with dust, pollen, and debris, they obstruct the essential air circulation through the system. This restriction reduces the heat pump’s ability to transfer thermal energy effectively, leading to insufficient heating output. To rectify this, you should inspect and replace air filters regularly. Manufacturers often recommend changing filters every one to three months, depending on usage and environmental conditions.


High-efficiency particulate air (HEPA) filters can enhance air quality while maintaining peak airflow. However, be cautious when selecting filters that are compatible with your system’s specifications. An improperly rated filter can exacerbate the airflow restriction issue, impairing performance. Always consult your heat pump’s manual for appropriate filter types and sizes.


Moreover, educating those you serve about the importance of routine filter maintenance can greatly improve system longevity and household comfort. A proactive approach enhances operational efficiency and contributes to a healthier indoor environment. Ensuring clean air filters addresses a critical aspect of heat pump maintenance, fostering an atmosphere that consistently meets comfort expectations.


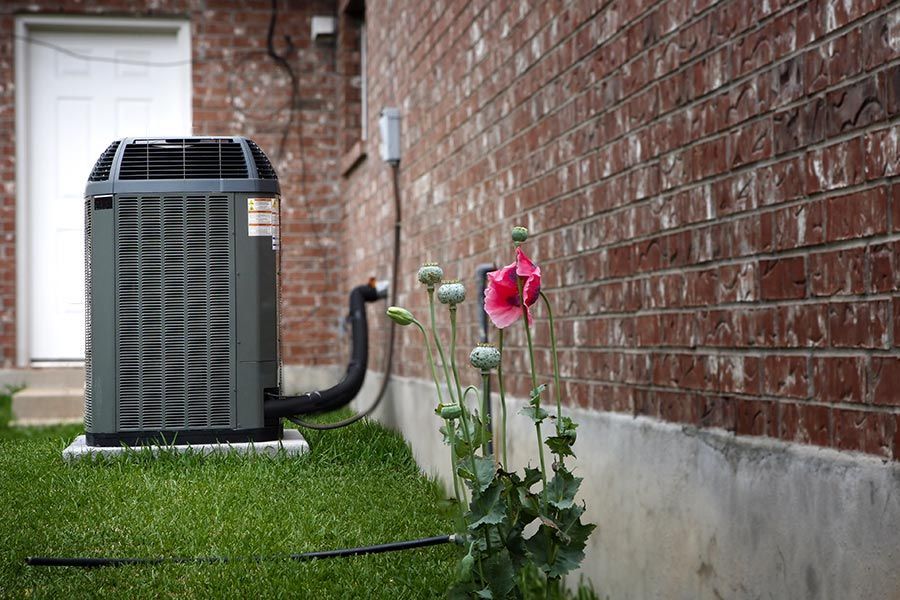
Blocked Outdoor Unit

A blocked outdoor unit hinders your heat pump’s performance by restricting airflow and causing inefficient heating. When debris, such as leaves, dirt, or snow, accumulates around the outdoor unit, it obstructs the necessary air exchange, leading to subpar heat transfer. This inefficiency forces your heat pump to work harder, increasing energy consumption while delivering inadequate warmth.


To resolve this, inspect the area surrounding the outdoor unit regularly. Maintain a clearance of at least two feet around the unit for ideal airflow. Remove any debris or vegetation encroaching on this space. You can achieve this by gently brushing or washing off dirt and leaves, being cautious not to damage the delicate fins or coils. In colder climates, clearing snow or ice promptly is critical to prevent blockage and potential damage.


Additionally, check the unit’s air intake grille for obstructions. Inspect the grille for damage or clogs, which could impede airflow. If necessary, clean or replace it to maintain efficiency. Regular maintenance, such as scheduling professional inspections and cleanings, guarantees your heat pump operates at peak performance, serving others by keeping your environment warm and comfortable. Remember, proactive care prevents major issues and enhances system longevity.


Refrigerant Leak Issues

Detecting a refrigerant leak in your heat pump can considerably impact its heating efficiency, disrupting the system’s ability to transfer heat effectively. A refrigerant leak reduces the system’s capacity to absorb and release heat, leading to inadequate heating performance. To identify this issue, monitor the heat pump for hissing or bubbling sounds, often indicating escaping refrigerant. Visual signs like oily residue around the refrigerant lines or connectors also signify leaks.


Addressing a refrigerant leak requires precision. First, ensure the system is turned off to prevent damage. Then, contact a certified HVAC technician who possesses the expertise and tools necessary for leak detection and repair. They’ll likely use an electronic leak detector or ultraviolet dye to pinpoint the leak’s location. Once identified, the technician will repair or replace damaged components and recharge the system with the appropriate refrigerant, restoring its efficiency.


Regular maintenance, including inspecting the refrigerant lines for corrosion and wear, helps prevent future leaks. By addressing refrigerant leak issues promptly, you enhance your heat pump’s performance and reliability, guaranteeing it effectively serves those relying on its warmth.


Frozen Heat Pump

When refrigerant issues are ruled out, and your heat pump still struggles with heating, you might face a frozen heat pump. This occurs when the outdoor unit’s coil becomes encased in ice, considerably inhibiting its ability to absorb heat from the surroundings. The ice formation acts as an insulator, preventing heat transfer and reducing efficiency. To address this, you’ll need to understand the root causes behind the ice buildup.

Consider these potential factors:

  • Blocked Airflow: Debris or obstructions around the unit can restrict airflow, causing condensation to freeze on the coil.
  • Faulty Defrost Cycle: If the defrost cycle malfunctions, the heat pump won’t be able to melt accumulated ice, leading to persistent freezing.
  • Low Ambient Temperature: Prolonged operation in extremely cold conditions without sufficient auxiliary heating can encourage ice formation.

To rectify a frozen heat pump, verify the area around the unit is clear of debris. Regularly check and maintain the defrost cycle functionality to confirm it activates when necessary. To prevent ice accumulation, consider supplementing with auxiliary or backup heating systems in areas with consistently low temperatures. With these steps, you can enhance the heat pump’s efficiency and confirm it serves others effectively by maintaining a comfortable environment.


Malfunctioning Reversing Valve

Identifying a malfunctioning reversing valve is essential, as this component directs the refrigerant flow and determines whether your heat pump operates in heating or cooling mode. A faulty reversing valve may prevent your system from generating sufficient heat. First, check if the heat pump is stuck in cooling mode by feeling the air from the vents. If it’s cold, the reversing valve might be the culprit.


To address this issue, listen for a hissing or unusual sound, which could indicate a failure in the valve’s internal mechanisms. You should also inspect the solenoid coil for electrical malfunction. Use a multimeter to measure the voltage and verify it aligns with manufacturer specifications. If the solenoid doesn’t activate, replace it promptly.


A valve that doesn’t switch modes might suffer from internal wear or debris obstruction. In such cases, professional intervention is advisable. HVAC technicians can perform a refrigerant pressure check to confirm if valve replacement is necessary. By understanding these technical aspects, you’ll effectively troubleshoot your heat pump issues, guaranteeing peak performance and comfort for those relying on your help. Remember, timely action can prevent further system inefficiencies and maintain a warm environment.


Ductwork Leaks

Besides reversing valve issues, insufficient heating may stem from ductwork leaks, compromising warm air distribution throughout your home. When ducts aren’t sealed properly, warm air escapes before reaching intended spaces, leaving rooms cooler than desired. Identifying and addressing these leaks can dramatically improve system efficiency, guaranteeing your heat pump operates at peak performance.


To detect ductwork leaks, you should:

  • Inspect visible duct sections: Look for disconnected joints, gaps, and holes in inaccessible areas, as these often signal leaks.
  • Conduct a smoke test: Release a stream of smoke near duct seams; smoke getting pulled into or blown away from seams indicates leaks.
  • Utilize thermal imaging: This technology can reveal temperature differences, pinpointing areas where warm air is escaping.

Once you’ve identified leaks, seal them using mastic sealant or metal tape. Avoid using standard duct tape, as it deteriorates quickly. Regularly check ductwork for new leaks and maintain insulation to prevent heat loss. By resolving ductwork leaks, you enhance heating efficiency and contribute to energy conservation, thereby serving others by promoting a more sustainable environment. Your proactive approach guarantees comfort and warmth for everyone in your household.
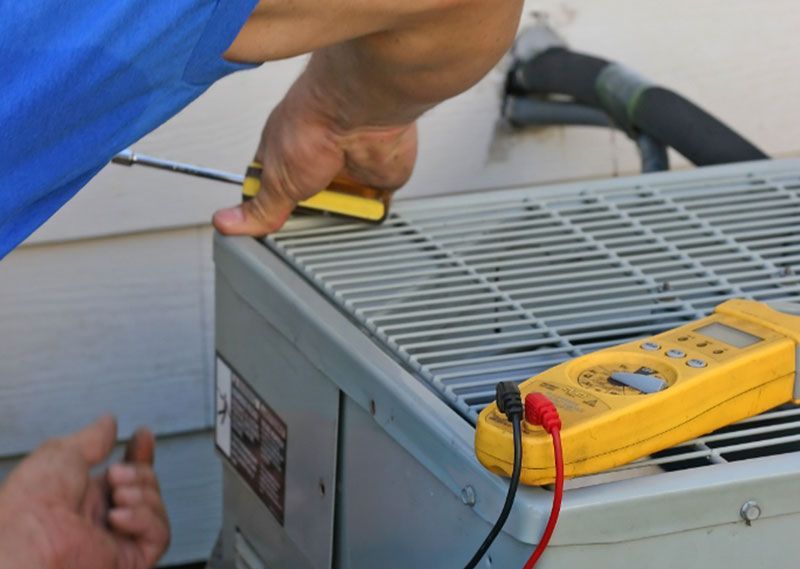

Faulty Compressor

A faulty compressor, integral to the refrigerant cycle, can severely impair your heat pump’s ability to provide adequate heating by failing to pressurize and circulate the refrigerant effectively. Without proper compression, the refrigerant cannot undergo the necessary phase changes to absorb and transfer heat efficiently. This malfunction typically stems from electrical issues, mechanical wear, or refrigerant leaks affecting the compressor’s functionality.


To address this, inspect the electrical connections for continuity and voltage irregularities, which could indicate a compromised power supply. Next, listen for unusual noises, such as rattling or hissing, which may suggest mechanical degradation or refrigerant escaping. Utilize a multimeter to verify electrical readings and confirm they align with manufacturer specifications. If discrepancies are present, professional compressor repair or replacement intervention may be necessary.


Regular maintenance, including cleaning and servicing, can preemptively mitigate compressor failure. By confirming the compressor operates within its ideal parameters, you not only restore heating efficiency but also extend the lifespan of your heat pump. This proactive approach guarantees you continue to provide a warm and comfortable environment for those in your care.


Insufficient Heat Pump Size

An undersized heat pump frequently struggles to meet heating demands, leading to inadequate indoor temperatures and increased energy consumption. When the heat pump’s capacity is insufficient for the space it serves, you’ll notice discomfort and inefficiency. The heat pump continuously operates, failing to cycle off, escalating energy costs, and prematurely wearing out components.

To address this issue, evaluate the heat pump’s capacity relative to the specific heating load. This involves a meticulous calculation considering the following:

  • Square footage of the space: Larger areas require higher BTU (British Thermal Unit) ratings.
  • Insulation quality: Poor insulation demands more from the heat pump to maintain desired temperatures.
  • Local climate conditions: Colder climates necessitate higher capacity to combat lower external temperatures.


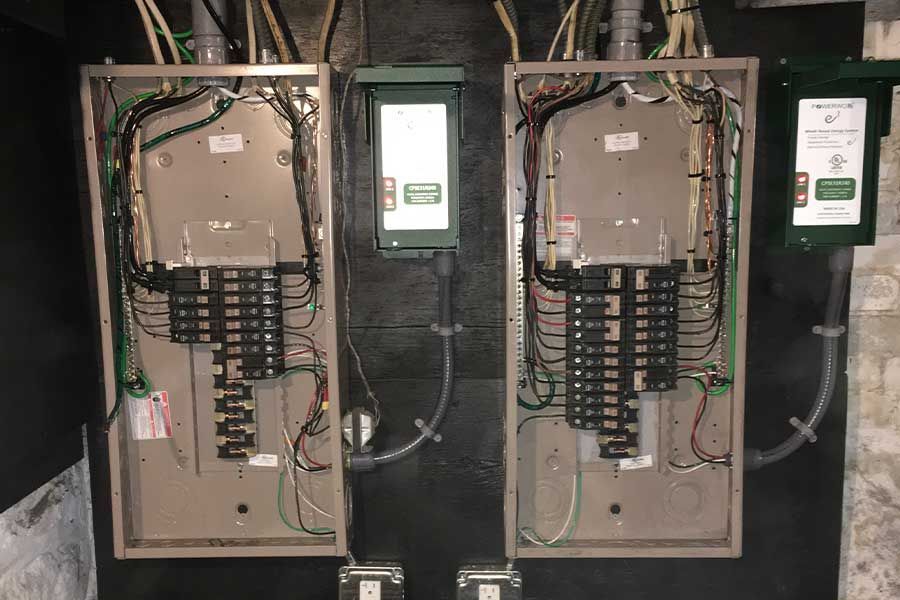
Improper Installation

Another common issue that affects a heat pump’s performance is improper installation, which can severely compromise efficiency and heating capacity. When a heat pump isn’t installed correctly, refrigerant leaks, ductwork inefficiencies, and incorrect electrical connections can lead to refrigerant leaks. These issues prevent the system from functioning at ideal levels. Properly addressing these installation errors is vital to guaranteeing your heat pump serves you well.


Begin by verifying the refrigerant charge. An incorrect refrigerant level can lead to less-than-ideal heating output and increased energy consumption. Use a manifold gauge set to check for the appropriate refrigerant pressure specified by the manufacturer. Next, inspect the ductwork for any air leaks or poor insulation, which can cause considerable heat loss and reduced airflow. Seal leaks using mastic or foil tape to enhance duct efficiency and guarantee proper air distribution.


Additionally, confirm that all electrical connections are secure and conform to the manufacturer’s specifications. Loose or incorrect connections can lead to intermittent operation or complete system failure. Addressing these installation issues can greatly improve your heat pump’s performance, providing efficient and reliable heating to those you serve.

Heat Pump Operates Efficiently

Conclusion

Remember that regular maintenance is essential to guarantee your heat pump operates efficiently. Did you know that clogged air filters can reduce efficiency by up to 15%? By addressing issues like thermostat missettings, airflow obstructions, and potential refrigerant leaks, you’ll enhance performance considerably. Regular inspections for ductwork leaks and proper installation can prevent inefficiencies. By staying proactive, you’ll not only optimize heating but also extend the lifespan of your heat pump system.


Frequently Asked Questions

How Does Weather Affect My Heat Pump’s Efficiency?

Weather impacts your heat pump’s efficiency as colder temperatures reduce its coefficient of performance. As outdoor temperatures drop, your heat pump requires more energy to extract heat, potentially diminishing its heating capacity and affecting comfort levels indoors.


Can Power Outages Impact My Heat Pump’s Performance?

Power outages can disrupt your heat pump’s operation. They disrupt the electrical continuity essential for peak performance, causing inefficiencies. Confirm backup systems are in place to maintain consistent service and comfort for those you serve.


How Often Should I Schedule Regular Maintenance for My Heat Pump?

You should schedule heat pump maintenance bi-annually to guarantee maximum efficiency and longevity. Regularly inspecting refrigerant levels, coil cleanliness, and electrical connections prevents malfunctions, guaranteeing your system effectively serves those depending on its reliable operation.


Does My Heat Pump Require a Backup Heating System?

You should evaluate your climate conditions. A backup heating system guarantees efficiency if temperatures frequently drop below the heat pump’s ideal range. Supplementary heating prevents discomfort and maintains service reliability, guaranteeing you serve others effectively.


Are There Energy-Saving Tips to Optimize Heat Pump Usage?

To optimize heat pump efficiency, guarantee regular maintenance, seal ductwork, and set thermostats accurately. Utilize programmable settings for peak energy savings. Educate yourself on system specifications, fostering sustainable practices to serve your community’s environmental goals better.

You might also like

March 10, 2026
When it comes to installing an EV charger in Port Washington, WI, you might be tempted to take the DIY route. However, hiring a professional brings a range of advantages you might not have considered. From ensuring compliance with local codes to providing safety and efficiency, there's a lot at stake. Plus, a pro can enhance your home's value. Curious about how these benefits can impact your charging experience? Let's explore further. Expertise and Experience in Electrical Systems When you choose Professional Services for your EV charger installation, you're tapping into a wealth of expertise and experience in electrical systems. Our certified professionals have extensive knowledge of the latest technologies and best practices in the industry. They understand the intricacies of home wiring and electrical loads, ensuring your charger installation is efficient and safe. By relying on our team, you're not just getting a quick installation; you're investing in a long-term solution that enhances your home's functionality. We take the time to assess your specific needs, recommending the ideal charger for your vehicle and lifestyle. Plus, our commitment to quality means you won't have to worry about future issues arising from improper installation. With our licensed and trained electricians , you're assured of a hassle-free experience, so you can focus on enjoying the benefits of your electric vehicle without the stress of DIY installations or potential hazards. Compliance With Local Codes and Regulations Guaranteeing compliance with local codes and regulations is essential for a successful EV charger installation. When you hire a professional, you can rest easy knowing they're well-versed in the specific requirements of Port Washington, WI. They'll navigate the complexities of local ordinances, electrical codes, and zoning laws, ensuring your installation meets all legal standards. This not only protects you from potential fines but also guarantees a safe and reliable charger setup. Additionally, professionals keep up with changes in regulations, so you won't have to worry about outdated practices. They'll also secure any necessary permits, saving you time and hassle. Furthermore, with their expertise in EV charging station installation , you can trust that the job will be done efficiently and effectively. Safe and Efficient Installation After ensuring compliance with local codes and regulations, the next step is to focus on safe and efficient installation of your EV charger. By hiring a professional, you can trust that the installation will be performed correctly, reducing the risk of electrical hazards. Experienced technicians know how to handle wiring and connections, ensuring everything meets safety standards. They'll evaluate your home's electrical capacity, making necessary adjustments to support the charger's power needs. This not only enhances safety but also optimizes performance, preventing potential malfunctions in the future. A professional will also provide valuable advice on charger placement for maximum convenience and efficiency. With their expertise, you won't have to worry about DIY mistakes or delays. Instead, you can enjoy peace of mind knowing your EV charger is installed safely and efficiently, allowing you to charge your vehicle without hassle. Additionally, professionals can assess your existing electrical panel to determine if upgrades are necessary for optimal performance. Enhanced Home Value and Convenience Installing an EV charger not only boosts your home's convenience but also enhances its overall value. With the rise in electric vehicle ownership, homebuyers increasingly seek properties equipped with charging stations. By adding a professional-grade charger, you're making your home more attractive to potential buyers, which can lead to a higher resale price. Additionally, having a charger at home saves you time and hassle. You can charge your vehicle overnight, eliminating the need to visit public charging stations. This convenience is particularly appealing for busy lifestyles, allowing you to start each day with a fully charged vehicle. Moreover, an EV charger signals a commitment to sustainability, an attractive feature for environmentally conscious buyers. Investing in this upgrade not only future-proofs your home but also enhances your daily life. Furthermore, it's essential to ensure that your electrical system can handle the increased load from an EV charger, as professional electricians can provide panel repair and replacement to support these modern installations. Ongoing Support and Maintenance Options While the initial installation of your EV charger is essential, ongoing support and maintenance are equally important to guarantee its best performance. Regular check-ups can help identify any issues before they escalate, ensuring your charger operates smoothly for years to come. By choosing a professional service, you gain access to expert guidance and solutions tailored to your needs. Here are some ongoing support and maintenance options you can benefit from: Routine Inspections : Schedule regular check-ups to catch potential problems early. Quick Repairs : Enjoy prompt service for any unexpected issues, minimizing downtime. Upgrades and Adjustments : Stay updated with the latest technology and improvements to enhance charger efficiency. Investing in ongoing support not only keeps your charger running effectively but also enhances your overall electric vehicle experience. It's about peace of mind, knowing you're covered whenever you need help.
March 10, 2026
While your family goes about daily life, the hidden threat of fire looms in the background. Proper smoke detector installation in your Thiensville, WI, home can make the difference between safety and tragedy. With various fire risks around, understanding the crucial role these devices play becomes essential. What types of smoke detectors are best for your space, and where should you place them? Exploring these questions can help safeguard your loved ones effectively. The Importance of Smoke Detectors in Home Safety Smoke detectors are vital guardians of home safety, providing an early warning system that can save lives. By installing smoke detectors in your home, you're taking an important step toward protecting your loved ones and property from fire hazards. These devices can detect smoke and alert you before a fire spreads, giving you precious minutes to escape or take action. Regularly testing and maintaining your smoke detectors guarantees they function properly when you need them most. It's not just about having them; it's about making sure they're in good working order. You should place them in key areas, such as bedrooms and hallways, where they'll be most effective. Additionally, installing both smoke and CO detectors is crucial for comprehensive safety, as carbon monoxide poisoning causes over 21,000 deaths annually. Types of Smoke Detectors Available When it comes to safeguarding your home, understanding the different types of smoke detectors available can make a significant difference. There are primarily three types you should consider. Ionization smoke detectors are great for detecting fast-flaming fires, as they respond quickly to small particles. Photoelectric smoke detectors, on the other hand, excel at sensing smoldering fires, which produce larger particles. Many experts recommend using both types for thorough protection. Additionally, you might encounter combination smoke detectors that incorporate both ionization and photoelectric technologies, giving you the best of both worlds. Some models even come with added features like carbon monoxide detection or smart technology, allowing you to monitor your home via smartphone. Moreover, it is essential to have routine inspections to ensure your smoke detectors are functioning correctly and providing optimal safety for your home. Ideal Locations for Smoke Detector Installation Choosing the right locations for installing smoke detectors is essential for guaranteeing your home's safety. You want to place them strategically to maximize their effectiveness. Start by installing a smoke detector outside each sleeping area, so you can hear it if you're asleep. Next, consider placing one on every level of your home, including the basement, to catch any early signs of fire. Here are some ideal spots: Living areas : Install detectors in common areas, such as the living room or family room, where smoke may accumulate. Kitchen : Place a smoke detector at least 10 feet away from cooking appliances to avoid false alarms. Hallways : Ensure you have detectors in long hallways, as they help detect smoke from distant rooms. Additionally, having regular electrical inspections ensures that your home's wiring is safe, further reducing fire risks. Maintenance and Testing of Smoke Detectors Regular maintenance and testing of your smoke detectors is essential for guaranteeing they function properly in an emergency. You should test your detectors at least once a month by pressing the test button. This simple action confirms that the alarm sounds and the device is operational. Additionally, replace the batteries every six months to keep them powered, even if the test button indicates they're working. Every ten years, consider replacing the entire smoke detector unit, as older models may not perform effectively. Keep the detectors clean by gently vacuuming them to remove dust and debris that can interfere with their functionality. Remember to review your smoke detector placement and verify they're installed in high-risk areas like kitchens and hallways. Furthermore, ensuring your smoke detectors are part of a comprehensive indoor air quality service can enhance safety by reducing potential hazards in your home environment. How Professional Services Can Help With Installation and Maintenance Maintaining your smoke detectors is essential, but proper installation also plays a significant role in guaranteeing your safety. Professional Services can provide the expertise you need for both installation and ongoing maintenance. Their certified technicians guarantee your detectors are placed in ideal locations, maximizing their effectiveness. Here are a few benefits of working with Professional Services: Expert Installation : Certified professionals handle the installation, guaranteeing compliance with local codes and regulations. Routine Maintenance : They offer thorough maintenance plans to keep your smoke detectors functioning properly, including regular testing and battery replacement. 24/7 Emergency Support : If issues arise, you can count on their reliable emergency service for quick resolutions. 
March 10, 2026
Rewiring your home can feel like a challenging task, but it doesn't have to be a terrifying ordeal. Every homeowner in Port Washington, WI, must prioritize safety when tackling electrical projects. Before you grab your tools, there are critical tips and precautions you should know to guarantee a secure and efficient job. Let's explore what you need to reflect on to keep your home safe and your project on track. Understanding When Rewiring Is Necessary When your home starts showing signs of outdated or faulty wiring, it's crucial to evaluate rewiring for safety and efficiency. Look for flickering lights, frequent circuit breaker trips, or burning smells—these can indicate serious issues. If your home's wiring is more than 30 years old, it mightn't support modern electrical demands, especially with all the devices we use today. You should also consider rewiring if you plan to renovate, add new appliances, or increase your home's square footage. The existing wiring mightn't handle the extra load, putting you at risk for electrical fires. Additionally, outdated materials, like knob-and-tube wiring, can be a red flag. Ultimately, if you notice any of these signs or have concerns about your home's electrical system, it's worthwhile consulting a professional. Understanding when rewiring is necessary guarantees your home stays safe and efficient. A professional assessment is recommended to ensure the integrity of your electrical system. Essential Safety Precautions to Take How can you guarantee your safety during an electrical rewiring project? First, always turn off the power at the main circuit breaker before starting any work. Use a voltage tester to double-check that the wires are dead; don't take chances. Wear rubber-soled shoes and insulated gloves to protect yourself from electrical shocks. It's also smart to have a first aid kit nearby in case of emergencies. Next, keep your workspace organized and free of clutter. This minimizes the risk of accidents and helps you focus. If you're using ladders or tools, make sure they're in good condition to avoid injuries. Lastly, consider having a qualified electrician assist you, especially for complex tasks. It's better to be safe than sorry, so don't hesitate to call in a professional if you're ever in doubt. Your safety is the top priority during any rewiring project. Additionally, remember that hiring a licensed electrician ensures that the work adheres to safety standards and regulations. Choosing the Right Materials and Tools Choosing the right materials and tools for your electrical rewiring project is essential to guarantee safety and efficiency. Start by selecting high-quality wires that match your home's electrical needs, such as copper or aluminum, making sure they're the appropriate gauge for your circuit. You'll also need reliable connectors, switches, and outlets that meet current safety standards. Invest in essential tools like wire strippers, pliers, screwdrivers, and a voltage tester. A good multimeter can help you troubleshoot issues and confirm everything's working correctly. Don't forget safety gear, including gloves and goggles, to protect yourself while working. When purchasing materials, opt for reputable brands to avoid subpar products that could lead to hazards. Familiarize yourself with local building codes to guarantee compliance. Additionally, consulting with professional electricians can provide valuable insights into the best practices for your rewiring project. Ultimately, having the right materials and tools won't only streamline your project but also enhance the safety of your home's electrical system. Hiring a Certified Electrician: Why It Matters Hiring a certified electrician is essential for ensuring your home's electrical rewiring is both safe and up to code. Certified electricians have the training and experience necessary to handle complex wiring systems, minimizing the risk of accidents or electrical fires. By hiring a professional, you'll benefit from their knowledge of local regulations and codes, ensuring your rewiring meets all safety standards. Additionally, certified electricians can identify potential issues that may go unnoticed by an untrained eye, preventing future problems and costly repairs. They also use the right tools and materials, which can save you time and hassle. Moreover, working with a certified electrician often comes with warranties on their workmanship, providing you peace of mind. This is crucial as electrical inspections for safety confirmation can help identify underlying issues before they become major problems. Ultimately, investing in a certified electrician not only protects your home but also enhances its value. So, don't cut corners—choose a professional for your electrical rewiring needs. Post-Rewiring Maintenance and Safety Checks Once your home's electrical rewiring is complete, it's vital to prioritize maintenance and safety checks to guarantee everything operates smoothly. Begin by testing all outlets and switches to verify they're functioning correctly. Look for any signs of flickering lights or unusual sounds, as these could indicate underlying issues. Next, inspect your circuit breakers for any tripped switches. If you find frequent trips, it may signal overloading or faulty wiring. Regularly check for any exposed wiring or damaged insulation, as these can pose safety hazards. Consider scheduling routine inspections with a certified electrician to catch potential problems early. It's also a smart move to keep your electrical panel organized and up-to-date with clear labeling. Finally, verify smoke and carbon monoxide detectors are functional, as they're vital for your family's safety.

Book a Service Today